What are we about here at Bakeroose?

Chef Stephanie Petersen is know as Chef Tess Bakeresse. She is joined in her cooking adventures here on the Bakeroose blog by her two sons, Little Man and Face. We also have regular posts from other Little Chefs who share their cooking adventures. Our kid's blog is a help to moms, grandmas, grandpas and caregivers. We want to help a whole new generation of cooks get excited about the culinary world. If you cook together and have the desire to join our Bakeroose, feel free to send an email to Chef Stephanie Petersen (chef-tess@hotmail.com). If we like what we see, we'll add your story! That simple. If you homeschool, welcome! We have a twice monthly bakeroose class that will be highlighted on this blog as a way to incorporate food science into your child's education. We hope you want to come back again and again. Even better, we hope you like it enough to want to share your cooking experiences and anything you learn along the way! We are so excited to hear from you! Chef Stephanie's main blog is http://www.cheftessbakeresse..com/

Cooking class information can be found here:

Kids Cooking Classes

Any class Chef Tess teaches with kids will usually be added here automatically! So...how cool is that?!

Showing posts with label Cooking with Adult Help needed. Show all posts

Monday, October 17, 2011

Homemade Cheese Crackers

Okay kiddos...how many of you like cheese crackers? We make a lot of them at our house and I thought I'd give you  quick tutorial. You need permission from an adult/parent to use the oven or need to make them with a parent or adult. You'll need several sheet pans, a large mixing bowl, measuring cups and spoons, a rolling pin, a pizza cutter some non-stick spray for the pans. 
 As for the cheese crackers. Let's begin. As a random fact, mine don't have any fake stuff in them so they're good that way. I also like to see the cheese...so if you like an orange cracker, you may have to melt your cheese more than I do. 

 Chef Tess' Homemade Gourmet Cheese Crackers


1 cup freeze dried cheddar cheese (or 3/4 cup sharp cheddar cheese)
1/2 cup warm water
2 1/2 cup whole wheat pastry flour OR 2 1/2 cup all purpose flour
1/4 cup olive oil
1/2 tsp baking powder
1/2 tsp salt


salt and seasoning of your choice. I use Chef Tess All Purpose Seasoning  


Directions: Preheat oven to 375 degrees.
In a bowl combine the flour, salt and baking powder. 


 Combine cheese and water. If you use fresh cheese, use only 1/4 cup water. The warmer the water, the better melted the cheese will be...but don't get it too hot or it will be gooey cheese. We want it to be able to blend. If using the freeze dried cheese, let it soak about 10 minutes.

Measure your pretty olive oil. I use Lucero Olive Oil because I adore the flavor. Make sure it's a good oil folks. 

 Combine the dry ingredients with the cheese mixture.


 Add the oil.


Mix until just combined. It only took about a minute.

Roll half of dough out on a lightly oiled baking stone. 


 Use a pizza cutter or a pastry cutter to cut the dough into squares.
 Prick with a fancy cracker making tool...like a fork.


I lightly mist the crackers with a little water from a spray bottle and then sprinkle with seasoning. Bake in preheated oven for 15-20 minutes until crispy. Mmm.
 I really love seeing the cheese in my crackers...but again, if you are more conventional...let the cheese melt a little longer.
There you go! Homemade cheese crackers. I'm looking forward to seeing all the ones you make!  Do you want the printable PDF for all the rest of the recipes for the class? Go here. Enjoy!


Thanks to Auntie Em!
 Get the printable of this tutorial:


cheese cracker tutorial PDF

Monday, January 3, 2011

Basic Crepes for Bakeroose

Okay Bakeroose. This is Chef Tess. I wanted to share a new something fun you can make with your mom and dad. We made them for dessert tonight for our Monday night "Family Night" after family games. Sometimes we make pancakes or biscuits for breakfast. Some times we make crepes. They are pretty awesome. This week's our wedding anniversary. We wanted to share something fun. I made crepes on the first date I went on with my husband. So...this seemed perfect for anniversary week.

Basic Crepes

4 eggs
1 cup water
2 tsp vanilla

1 c. flour
1 T. sugar
1/3 c. instant powdered milk
1/2 tsp. salt
to that ad Blend in blender or really well by hand.

Now...for those who want the play by play on how to cook these little cuties. Combine the dry ingredients. I added a grate of fresh nutmeg.

In a separate container, combine the wet ingredients very well. Add the wet to the dry and mix until all the lumps are gone. You may have to use a stainer. The batter should be just thick enough to coat the back of a spoon.


Use a very small amount of oil in a non-stick skillet. I use an 8 inch skillet...and


Medium low heat. If your pan is too hot the crepe batter will start to cook before you can coat the pan with it. Little Man said, "Mom, you're famous for gas." I know he meant using a gas stove...but then he said, "Oooo. The eternal blue flame." I'm still laughing thinking about it.

I use 1/4 cup batter and just roll the pan around until the batter lightly coats the bottom of the pan. Cook 2-3 minutes on one side and then gently turn over.

Usually you'll have one side that gets a little more brown than the other. Look at these though!
Now, on our first date, We filled the crepes with cottage cheese and some fresh fruit the first time I ever had them. They're awesome with cheesecake filling (you can get that already made if you want)
We then had to drizzle something. Drizzle is not optional in my family. We drip. We drizzle. We enjoy the food experience. Especially this one.
We used homemade sauce, but you can very easily make your own by adding a few tablespoons of juice to 1 cup of seedless jam.


There you go. Crepe away!

Sunday, December 12, 2010

Edible Stained Glass Gingerbread Cookie Ornaments

Are you ready to make some cool cookies for the holidays? It's Chef Tess here, wanting to add a little fun to your days. Here's a great idea...

We've been making some Edible Stained Glass Gingerbread Ornaments Friday in preparation for the next segment we'll be doing on Fox 10 this upcoming week with Face and Little man. I first saw these Stained-Glass Ornaments on Epicurious.com. So we spent Friday morning crushing candy in the food processor and making the cookie dough.

Stained-Glass Ornaments

3 cups all-purpose flour
1 teaspoon baking soda
1/4 teaspoon salt
3/4 teaspoon ground cinnamon
1/2 teaspoon ground ginger
1/8 teaspoon ground nutmeg
3 tablespoons unsalted butter, at room temperature
1/2 cup firmly packed dark brown sugar (I used white sugar)
3/4 cup unsulfured molasses ( I used maple syrup)
1/3 cup water
6 ounces translucent hard candies in colors of choice, crushed (in a food processor)
Preparation1. In a large bowl, whisk together the flour, baking soda, salt, cinnamon, ginger, and nutmeg. Set aside.

2. In a large bowl, with an electric mixer, beat the butter on medium speed until creamy. Add the sugar and molasses and beat for 2 minutes. Beat in the water. On low speed, beat in the flour mixture until a soft dough forms.

3. Gather the dough into a ball and wrap in plastic wrap. Refrigerate until firm, at least 1 hour or up to overnight.

4. Preheat the oven to 350°F. Line cookie sheets with parchment paper.

5. Divide the dough into thirds. Divide each third into 10 equal pieces. Using your palms, roll each piece on a lightly floured work surface into a rope 1/4 to 1/2 inch in diameter. Gently trace the design of your choice onto the prepared cookie sheets (a wooden spoon handle or chopstick works well for tracing on foil). Outline each design with a rope of dough, pressing the ends together to seal securely.

6. Sprinkle the inside of each design with the crushed candies, dividing the candies evenly among the outlined designs and creating an even layer.

7. Bake in the center of the oven or until the edges of the cookies are golden and the candy has melted, 6 to 9 minutes. Let the cookies cool on the cookie sheets on wire racks until the candy hardens, about 5 minutes. Gently peel the parchment away from the cookies and transfer to the racks to cool completely.

Cookie Exchange Tip:
To make this cookie into a tree ornament, attach a loop made from the dough to the top of each cookie before baking. After the cookie is baked, thread a piece of ribbon through the loop and tie the ribbon in a bow. To make these ornaments at a party, prepare the cardboard patterns in advance.


There you go. I'll add more pictures soon on the process, but couldn't resist sharing the recipe quickly. Most likely you'll need adult help with this project. But have fun, we sure did!

Tuesday, June 15, 2010

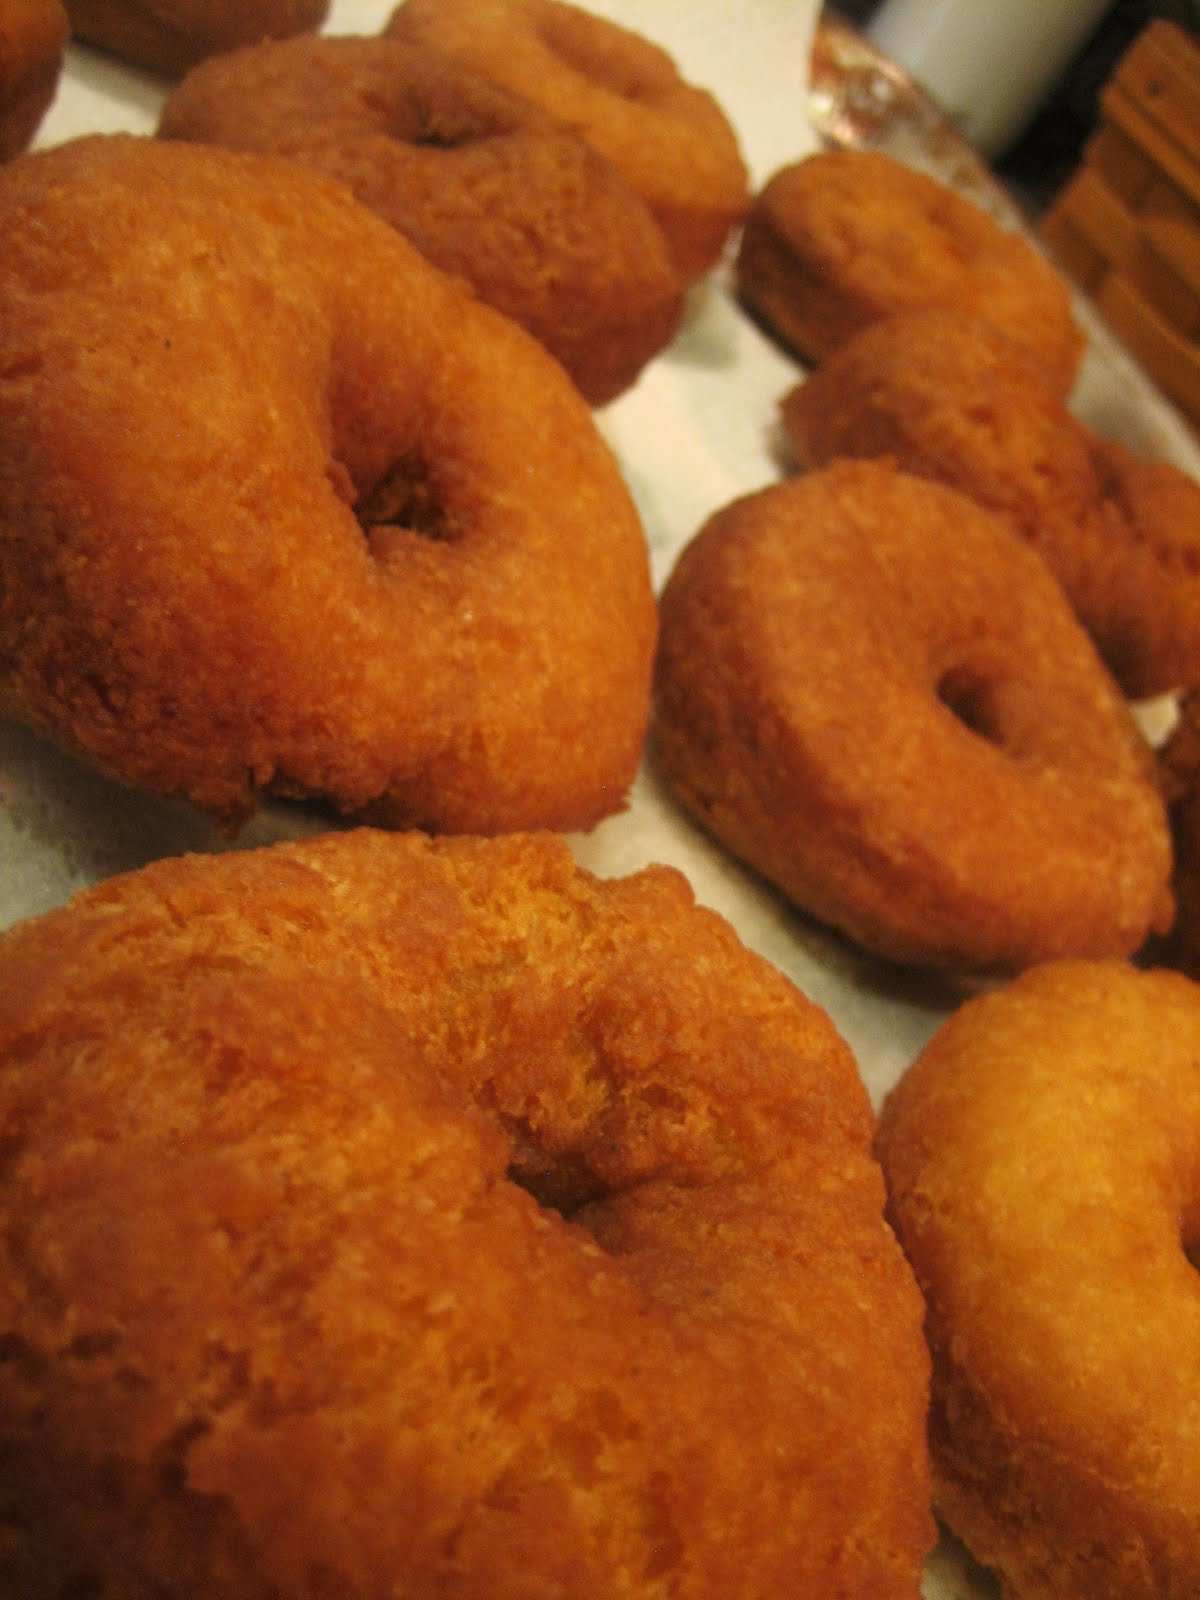
Bakeroose Buttermilk Doughnuts

The bakeroose got together for some crazy doughnut making cooking class time with the home school group. It was wild! Here are some highlights...

Make sure if you decide to do doughnuts that you have adults help. It's dangerous...but fun!


The recipe for these is at the end of this post...


After we eat...then we post.


Buttermilk doughnuts:
yield 4 dozen large or 10 dozen doughnut holes

Combine wet ingredients:
2 cup buttermilk
4 eggs
1T vanilla
Combine dry ingredients:

2 cup sugar
1T plus 1 tsp baking powder
1T plus 1 tsp baking soda
1 tsp nutmeg
2 tsp salt
7 cups all purpose flour
Pour wet ingredients into the dry ingredients and knead until a soft dough is formed. Roll out to 1 inch thickness and cut into doughnuts. Cook in hot frying oil in a deep pot. This needs to be done with an adult...3 minutes on each side. Remove from oil with a metal scooper and place on paper towel to drain. Coat with powdered sugar or frosting.
small batch:
1/2 cup buttermilk
1 egg

1/2 cup sugar

1 tsp vanilla

1 3/4 cup all purpose flour

1/2 tsp salt

1 tsp baking powder


1 tsp baking soda


Okay guys...shake your doughnuts in a paper bag with some powdered sugar or cinnamon sugar!

There you go!

Friday, February 19, 2010

Homemade Lollie-pops (Adult Help Needed!)

Chef Tess here, and it seemed like a really good idea to have moms, dads, grandma's and caregivers be able to read about this here as well. So, I'm re-posting it. Hopefully it gives everyone a good idea of what they can do with the kids! Enjoy...


" Oooo-da-lollie, Oooo-da-loolie, gollie what a day." Does anyone else remember that song? It was on the old Robin Hood Disney movie and every time I ever think of lollies, that's the song that pops in my head. It then stays there for forty-seven days. It may be the sign of a very simple mind, or, I hope some unprecedented sign of unfathomable genius. I'm going with genius until further notice.

My grandma used to make hard candy suckers with her eight grandchildren in a cozy little kitchen in the seventies. We'd dawn gingham and flour sack homemade aprons and gather around her gas stove as she showed us how to boil the syrup. Last week when my sons where in a heated debate over the question, "Can you make candy at home?" I had to interject my know-it-all chefie attitude and tell them about my grandma. Aside from thinking I was just spouting off old stories, they got really quiet. Any chance to keep my prattle mouths quite is well received. So...we headed out to the craft store and quickly picked up a few items needed for homemade candy making. Not because I thought my kids needed more sugar, but because they had a hole in their "fabric of knowledge" when it came to all things foodie related. We most definitely can't have that!

I mentioned in my last post about the oil based flavors.( https://www.lorannoils.com/ ) These are what we use exclusively for hard candy making. I like a fire invoking cinnamon, but the kiddos prefer butterscotch, grape, apple, and English Toffee (to name a few).
Shameless product plug here...but I love it in frosting too. I can't live without it in fudge. My truffles...well, they are well acquainted. It doesn't change the consistency of a frosting, but adds a huge dimension of flavor, since it bonds with the fat. Same with fat in chocolate. I dare say the fat on my patootie probably has a nice infusion. Orson H. Gygi's in Utah has a huge display of them and I almost died when I visited my parents and saw my ol' favorite cooking store full of such a shocking display (in a good way...my patootie was not included on the display rack). Remember the name. Stock up. We use them all the time.
On the back of the package there was a nice little recipe for old fashioned hard candy. Do I really need to type it out or can y'all just read the box? Okay. I'll type it out.


You can find the recipe here:
https://www.lorannoils.com/p-8752-stove-top-hard-candy.aspx
(Using 1-dram (.125oz) bottles)
Ingredients:
2 cups granulated sugar
2/3 cup light corn syrup
¾ cup water
1 dram LorAnn flavoring oil (1tsp.*) (or as desired)
LorAnn liquid food coloring (as desired)
Powdered sugar (optional)
Sucker bags (optional)
Twist ties (optional)
Use of a candy thermometer is recommended

*Please note that LorAnn Cinnamon, Clove and Peppermint flavors are particularly potent. You may wish to reduce the amount used for these flavors. I like my cinnamon really hot. My kids go cross eyed and start to spray flame out their ears when they eat my cinnamon-berry pops. This is of course how I keep them from eating too much sugar.

Before you begin, I recommend reading LorAnn's suggestions on candy making found in the "Tips" section of Gourmet Recipes on their website. Hard candy making requires the use of very high cooking temperatures. Caution should be used at all times to avoid being burned. Don't let the kids pour the syrup or stir the pot. Be smart here. Really.

Directions:
Have all ingredients and tools assembled and within easy reach of the stove. The use of metal spoons and measuring utensils is recommended. Lightly spray cookie sheet* or the cavities of clean, dry candy molds with cooking spray (LorAnn recommend PAM). Insert sucker sticks. (If using two-piece plastic or aluminum molds, insert sticks after candy has been poured into molds.) If using molds, you may also want to spray a piece of aluminum foil with cooking spray. If after pouring the candy into the molds you have excess candy, you can pour it onto the foil. We do that almost every time...and end up putting some "free form" circles of candy on the foil and popping in some sticks for suckers without molds. They look really artsy and almost make me homesick.

In a 2-quart kettle or large saucepan, mix together sugar, corn syrup and water. Stir over medium heat until sugar dissolves. Insert candy thermometer if using, making certain it does not touch the bottom of the pan. Bring mixture to a boil, without stirring.
No stirring. I did maybe once, but that was it...and it was just at the beginning. NO stirring after that. Don't do it. You'll get really gritty grainy candy.
Clamp your candy thermometer onto the side of the pan, into the syrup but not touching the bottom of the pan. You want to read the syrup temperature, not the pan temperature, right?
Early in the cooking process, you can "wash down" any sugar crystals that form on the sides of the pan with a wet pastry brush. I use a silicone brush so I don't get any loose hair in there too. Continue to cook the syrup until the temperature reaches 260ยบ F; add color. Do not stir; boiling action will incorporate color into syrup.
Remove from heat precisely at 300° F (temperature will continue rising), or until drops of syrup form hard, brittle threads in cold water. After boiling action has ceased, add flavor and stir. USE CAUTION WHEN ADDING FLAVORING TO AVOID RISING STEAM.

Pour candy into prepared molds. I lightly spoon it into individual lollie molds. Do not refrigerate.

Cool completely. Remove from molds. Place in sucker bags and secure with twist ties.


There you go. Oooo-da-lollie!
>