What are we about here at Bakeroose?

Chef Stephanie Petersen is know as Chef Tess Bakeresse. She is joined in her cooking adventures here on the Bakeroose blog by her two sons, Little Man and Face. We also have regular posts from other Little Chefs who share their cooking adventures. Our kid's blog is a help to moms, grandmas, grandpas and caregivers. We want to help a whole new generation of cooks get excited about the culinary world. If you cook together and have the desire to join our Bakeroose, feel free to send an email to Chef Stephanie Petersen (chef-tess@hotmail.com). If we like what we see, we'll add your story! That simple. If you homeschool, welcome! We have a twice monthly bakeroose class that will be highlighted on this blog as a way to incorporate food science into your child's education. We hope you want to come back again and again. Even better, we hope you like it enough to want to share your cooking experiences and anything you learn along the way! We are so excited to hear from you! Chef Stephanie's main blog is http://www.cheftessbakeresse..com/

Cooking class information can be found here:

Kids Cooking Classes

Any class Chef Tess teaches with kids will usually be added here automatically! So...how cool is that?!

Thursday, September 13, 2012

Spider Bread!

We are going to make some spider bread for October.

Spider-Pan Dulce...Tutorial

With Halloween coming this next week, I thought I'd share how I make my Spider-Pan Dulce! Isn't she beautiful all perched on top of that loaf of bread? Well...she's also 100% edible! Isn't that crazy! I recently got all my licensing in place to sell bread and pastries from home (via AZDHS) So...it's on the level to make them here and ship. At any rate, if you don't want to make the spider bread yourself, they can be ordered here  along with a lot of my other baked goods here


To make the loaves yourself, take one pound of bread dough. Today I used Sweet Potato Yeast Bread but you could easily use my 5 day bread dough as well. take a 2 oz ball of dough out of the loaf and set aside. Pull the rest of the dough into a tight ball. 


Place seam side down on a large sheet pan lined with parchment paper. Poke a hole in the center of the top of the loaf and form the 2 oz of dough into a spider, placing the legs down first and then topping with the body of the spider. 


Using a dough cutter, make deep cuts into the loaf in a diamond shape, leaving the spider on the top intact.

Allow to raise 35-45 minutes.  Preheat oven to 375 degrees. Bake 40-45 minutes until internal temperature of 165 degrees.  Follow my directions for the basic bread painting here.  To get the white, use edible white gel paste. I have other methods...but that one is the simplest by far. The gel paste colors are perfect for bread too!  

There you go. 

Always My Very Best,
Chef Tess!

What are you making fun for Fall?!

Thursday, July 5, 2012

Summer Skillet Pizza! Fun and Easy for Camping!

 Tomorrow I'm visiting our local Good Morning Arizona channel 3 TV station for a cooking segment on easy camping and summer meals for kids! I'm so excited to meet everyone there and cook with some new folks! The segment airs at 8:45 so if you're local, it should be a fun piece. I wanted to share one of the ideas I've used for camping that is just way too fun for kids and adults! I make pizza while camping using a skillet with a lid. It is fast, easy, and certainly can be done at home as well. In the summer this will give you that crispy crust and gooey melted cheese without the oven heating your house. I can make them a lot healthier and cheaper than purchasing the pre-made frozen meals and they take about 20 minutes to make 10-12 ready-to-eat pizzas!  For the most part, camping meals need to be simple. If I'm not using one of my shelf-stable convenient 52 jar method meals, I'll usually bring along some of these! You will need store purchased pita bread or you can use the  homemade pita bread tutorial. Today I'm using some grilled panini flat bread. It really doesn't matter what you use for the crust, as long as it is thick enough for a pizza. When the boys were younger I'd use homemade English Muffins, split in half they made two mini pizzas. Now we need the bigger size. They're getting into teen years and it is a whole new grand adventure!  The best part of the skillet-pizza is that it doesn't heat the oven and it gives us a gooey cheese with a crispy crust. That's hard to do in the microwave. It's just freakishly cool!
 I still try to suck the life out of the time I have with them and that included having them help make the meals they'll be eating while I'm at work. They like having some time with me. I have to admit, I adore having some time with them as well. So, this is my son aka Face. He's shredding the cheese and helping spread the sauce.
 I lay out enough pieces of foil to accommodate all the pizzas. In this way, we can make a whole bunch at once and have 10-12 pizzas on-hand for quick meals. This is great for camping too because the work is already done. I like not having to prepare food in the rough.
 Put a pita on each 10 inch piece of foil. Add sauce of your choice, just about 2 Tablespoons.
Put the children to work. They love this part!
 Top with cheese and your favorite toppings.
 Sprinkle with an outstanding Italian Seasoning. Um...I tend to lean toward my own blends whenever possible. Yup. I'm a fan.
 Now if you use a tomato based sauce, be sure not to use a foil to cover the pizza. The acid in the tomato sauce will react to the foil and make a terrible mess. It will taste horrid. I'm using a parchment lined foil. You can use wax paper here as well. Just cover the top of the pizza. Wrap the foil from the bottom around the pizza.
 Place in a gallon size freezer bag. We can usually get 5 pizzas in a bag. Freeze. I keep 3 or 4 in the fridge (up to 4 days) so the boys don't have to even defrost the pizzas. For camping, I always freeze them. This keeps them at a safe temperature and helps prevent food born illness. Remember the picnic food safety segment? It keeps them together and adds to the cold of my ice chest. For more information on picnic safety go here.
 To prepare, simply slip the pizza out of the wrap and place in a thick covered skillet. Mine is 14 inches and the bottom is thick enough to not burn the crust.
 The main secret is making sure the flame is low and letting them cook with the lid on the pan about 7-10 minutes.
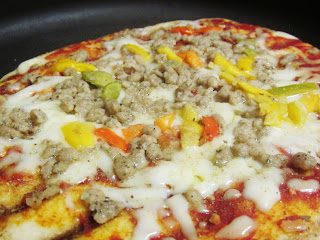
 The cheese will melt and the pizza will have a crispy crust. It's just what we love in a pizza without all the trouble of baking it.
Ironically we find ourselves using this stove-top method a lot more at home than we do camping. After all, how often do we really go camping? On the other hand, when we have taken them camping we have been very excited to have pizza! This is great for a Dutch oven or even on "no burn days" here in Arizona when we have to use our Solar Oven. Tomorrow I'll be sharing a few new tips for camping as well as the fun Hobo Foil Dinner that my kids adore! I'm looking forward to an amazing segment tomorrow! There you go! Make skillet Pizza and don't forget to watch tomorrow morning! Always My Very Best, Your Friend Chef Tess
>